Commands
Overview
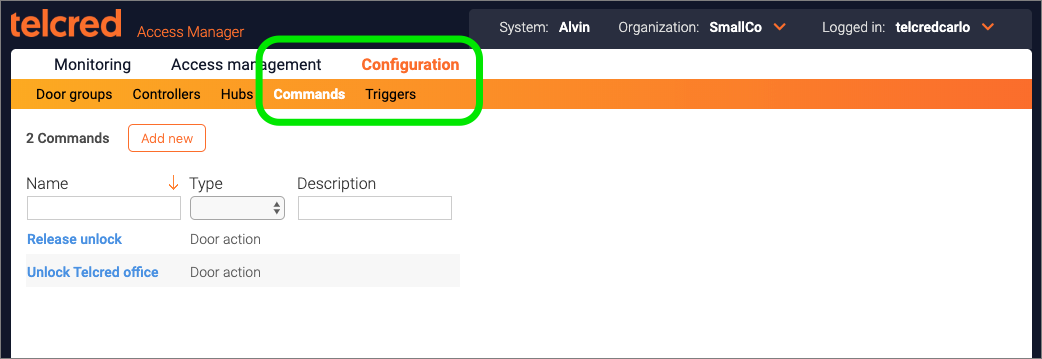
A command is defined as a set of one or more predefined actions that can either be performed by an administrator or as a result of a predefined trigger event. Commands and triggers are found under the Configuration section in the main menu.
Some use cases for commands and triggers include:
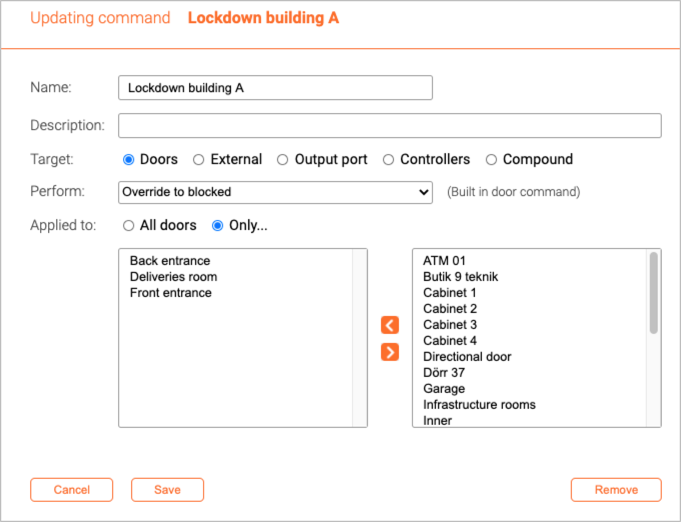
- Perform an action simultaneously on a number of doors, a door group, or a combination of both (e.g. block all doors in a section of the building to achieve a "lockdown").
- Interact with an external system (e.g. arm or disarm an intrusion detection system or turn on the lights)
- Allow end users to perform an action normally only available to administrators (e.g. unlock a door or return it to schedule)
Commands
Command targets
When creating a new command, you need to give it a name and define its target:
- Doors. Performs an action on one or more doors. The actions available are the same that the administrator can perform from the door detail page.
- External. Will make an http request to an external system. It is possible to specify the URL, http method, and body.
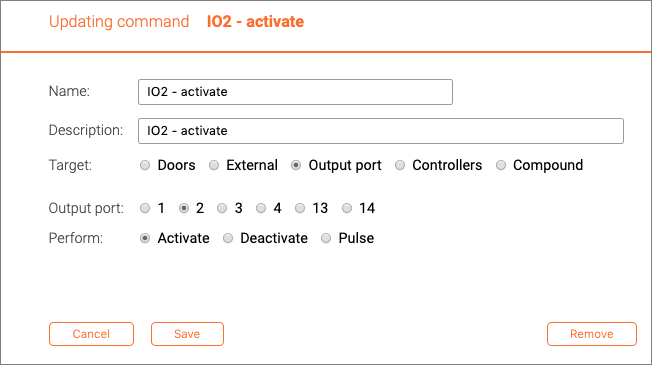
- Output port. Activate, deactivate, or pulse an output port.
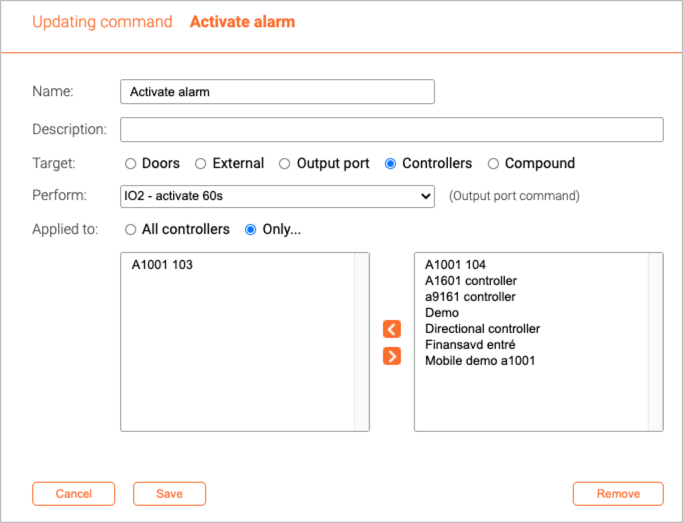
- Controllers. Target the output port(s) of one or more specific controllers.
- Compound. Perform a series of commands of any type listed above. Furthermore, a compound command can also refer to other compound commands (they can be nested). One example usage of compound commands is to create a command which both affects doors and can interact with external systems, e.g. block all doors in one building, turn on a siren connected to an output port, and make an http request to an alarm center.
Performing commands from the administrator GUI
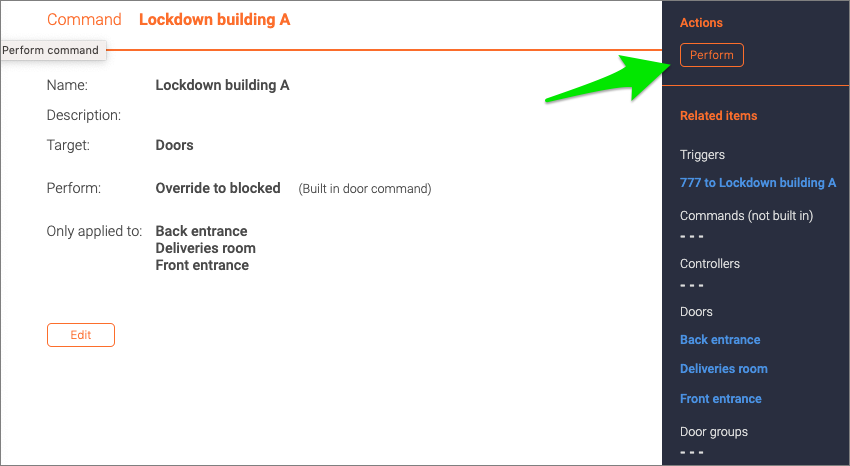
In most cases, it is possible to perform (or "run") the command straight from its detail page:
The exception to this rule is ouput port commands, which need to be started from a controller detail page (see below).
Commands targeting output ports
Configuring commands that target the output port(s) on one or more controllers is a little complicated. First, it is necessary to configure the command(s) with target Output port. It is necessary to specify which output port the command should act on and what the action should be (activate, deactivate, or pulse).
Note that not all controllers have all IO ports (e.g. Axis A1001 only has IO1 and IO2) so it is necessary to know which type of controller that will be used when specifying the output port of the command. It is also necessary to configure the IO ports of the controller.
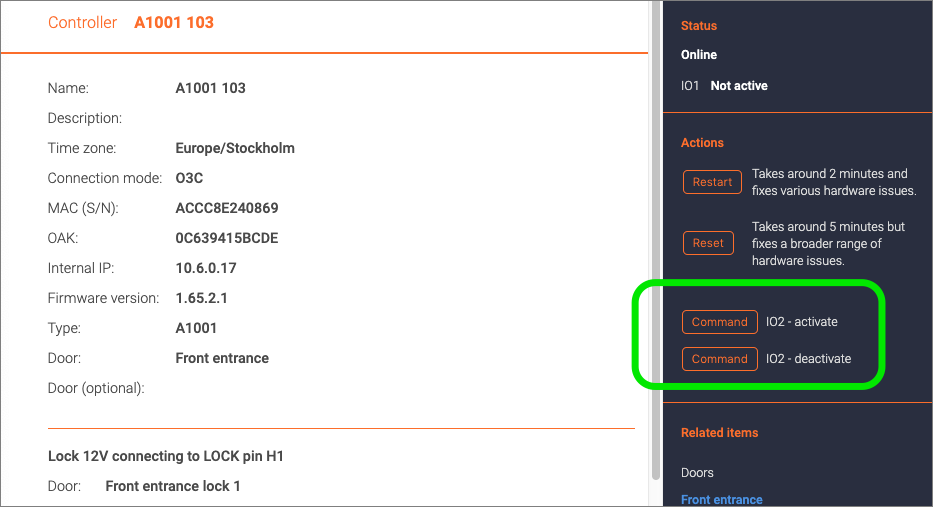
Command(s) with target output port cannot be performed directly from the command detail page (as it has not been defined which controller(s) they should target). Instead, they can be performed from a controller detail page if the controller has a matching output port configured. The command button(s) will show up under the Actions section for the controller.
Another way to perform an output port command is to specify it as the action of a command with target Controllers and then tie the command to a trigger (see further below). One example where this could be relevant is if the output port of a specific controller has been directly connected to e.g. an alarm panel and it should be possible to arm or disarm the alarm from any of a number of readers.
Triggers
Trigger types
Triggers are a way to start one or more commands. There are several trigger types:
- Reader anonymously. The trigger is activated by entering a special code on an access control reader. No authentication required.
- Reader - PIN authentication. The trigger is activated by entering a special code on an access control reader, followed by a personal PIN.
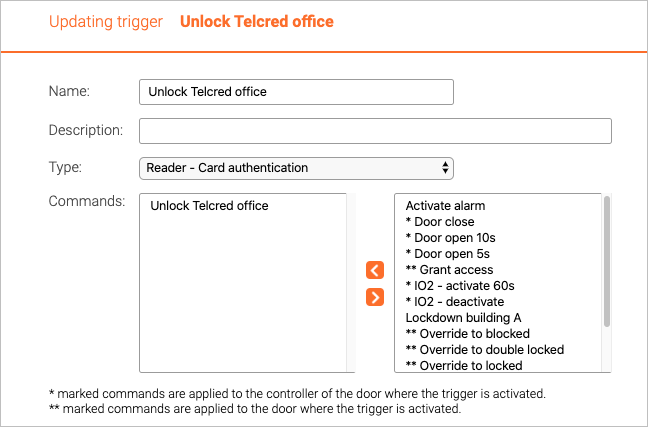
- Reader - card authentication. The trigger is activated by entering a special code on an access control reader, followed by a card credential.
- Access granted. The trigger is activated when access is granted through a reader, the Telcred Entry app, a visit URL, or REX (but not by an administrator or through the API).
- Door forced open. The trigger is activated when a Door forced open event occurs.
- Remote by overview. The trigger is available from the Telcred Entry app, without first selecting a specific door.
- Remote by door. The trigger is available from the Telcred Entry app, after selecting a specific door. The door from which the trigger was activated will be considered in the command.
- IO port activity. The trigger is activated when an input port on a door controller changes state.
Setting up a reader (door) trigger
Reader triggers are activated by entering a special code on an access control reader. First, it is necessary to define which command(s) the trigger should start. A reader trigger can start any type of command(s), including both door actions and user defined commands.
Native door actions are applied to the door of the reader where the trigger is activated and output port commands are applied to the controller of the reader where the trigger is activated. If it is desired to manipulate other doors or other controllers, it is necessary to first create commands with target Doors and/or Controllers.
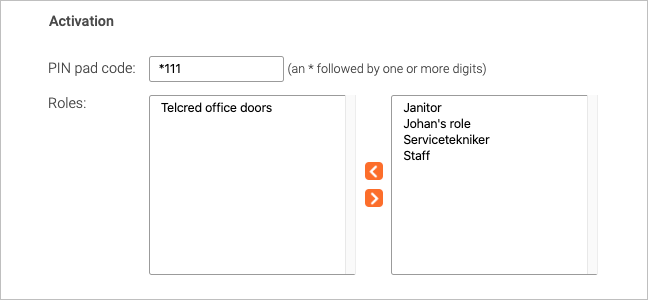
The next step is to define how to activate the trigger. Reader trigger activation codes always start with a * followed by one or more digits. It is recommended to use the same number of digits as for normal user PIN codes minus one, so that the total length of the activation code including the * matches the max PIN length.
Reader trigger activation codes need to be unique over the doors in their scope. This means that two different triggers can have the same activation code, as long as the doors they are restricted to (see below) do not overlap. An example of where this can be useful is if a trigger is used to lock down the building where the trigger is used. In this example, users only have to remember one code, but only the doors of the building where the activation code is entered will be affected.
For reader trigger types that require an authentication credential (PIN or card) it is necessary to specify which role(s) that should have access to the trigger. Note that in this context, the PIN is the user's PIN, which has nothing to do with the trigger activation code.
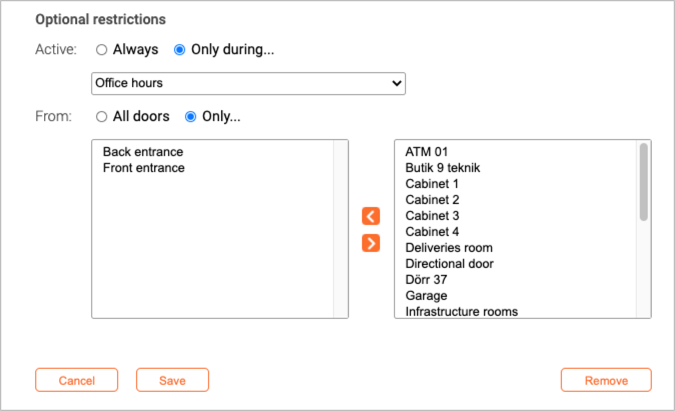
Finally, it is possible to define restrictions on the trigger:
- When it can be entered (schedule)
- From which doors it can be entered (doors and/or door groups)
Activating a reader trigger
All readers behave a bit differently, however the general process will look like this:
No authentication credential required
- Enter the activation code (e.g. *111).
- Wait for a blinking "success indicator" (will blink for approx. two seconds). The success indicator indicates that the command completed successfully, and will look different on different readers. If the success indicator is not displayed, the command failed to complete all of its actions.
Authentication credential required
- Enter the activation code (e.g. *111).
- Wait for the reader to start blinking (can take a few seconds). This means that the reader has been temporarily blocked and is ready to receive the authentication credential (i.e. user PIN or card) without granting access.
- Wait for a blinking "success indicator" (will blink for approx two seconds). The success indicator indicates that the command completed successfully, and will look different on different readers. If the success indicator is not displayed, the command failed to complete all of its actions.
Setting up an access granted trigger
For an access granted trigger it is not necessary to specify any activation. The trigger will activate on all user initiated access granted events (but not on access granted events initiated from the Telcred API).
It is possible to define restrictions on the trigger:
- When it can be activated (schedule)
- From which doors it can be activated (doors and/or door groups)
Setting up a door forced open trigger
For a door forced open trigger it is not necessary to specify any activation. The trigger will activate when a door forced open event occurs.
It is possible to define restrictions on the trigger:
- When it can be activated (schedule)
- From which doors it can be activated (doors and/or door groups)
Setting up a remote trigger
Remote triggers are activated from the Telcred Entry app. There are two types of remote triggers:
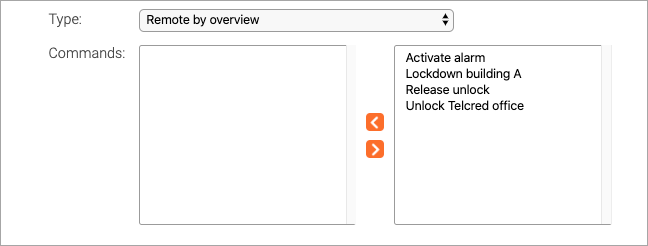
- Remote by overview
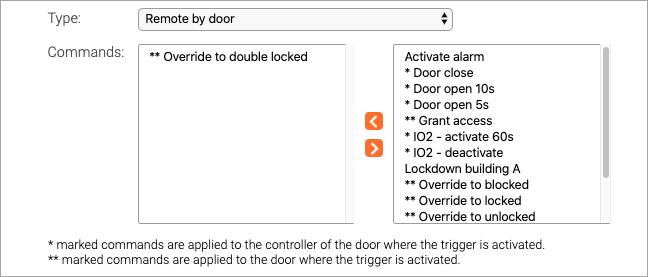
- Remote by door
Remote by overview triggers do not include information about any specific door when they are activated by the user. Therefore, they can only be used with commands defined by the administrator (as opposed to "native" door commands, e.g. override to unlock). In other words, remote by overview should be used for commands that do not target a specific door.
Remote by door commands are available from the door page in the Telcred Entry app, and include information about the door when they are activated by the user. Therefore, they are suitable for triggering commands that target individual doors, e.g. override to unlock, override to locked, etc.
It is possible to define a remote by door trigger that invokes a command that does not target any specific door. However, that has the potential to confuse the end user, so it is not recommended to do so. The reason administrator defined commands are available also for remote by door triggers is that a trigger can invoke several commands of which one could be door specific and others not (e.g. unlock the door and turn on the light).
Setting up an IO port trigger
For an IO port trigger it is necessary to specify the input port and transition that should activate the trigger.
Just as for commands targeting the output port(s) not all controllers have the same number of IO ports, so it is necessary to know which type of controller that will be used when specifying the input port for the trigger. It is also necessary to configure the IO ports of the controller.
As for other trigger types, it is possible to define restrictions on the trigger:
- When it can be entered (schedule)
- From which doors it can be entered (doors and/or door groups)
